How do I change the WLAN password?
For security reasons, the WLAN password can only be changed on one of the Hoval control modules directly (e.g. on your Hoval plant or a wall-mounted control module). Just follow the steps below.
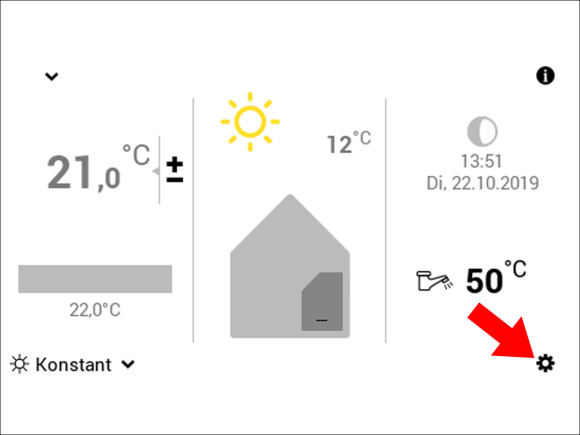
Step 1:
Click on the “Settings” icon at the bottom right.
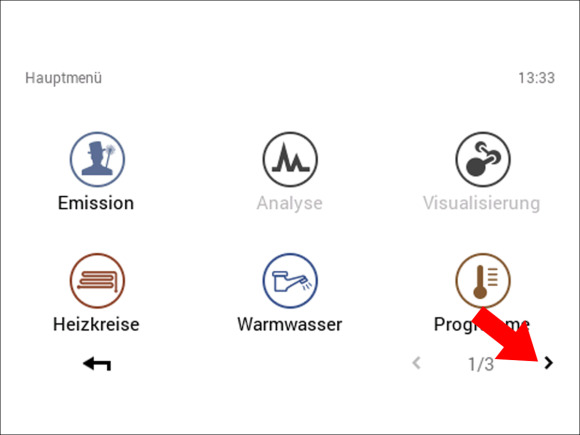
Step2:
Click on the arrow at the bottom right to go to the second page of settings menus.
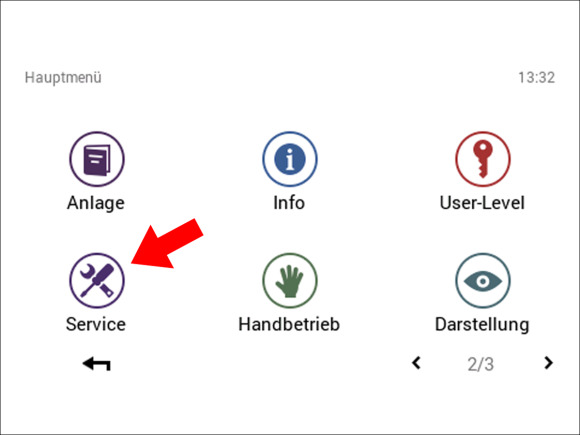
Step 3:
Click on the “Service” icon.
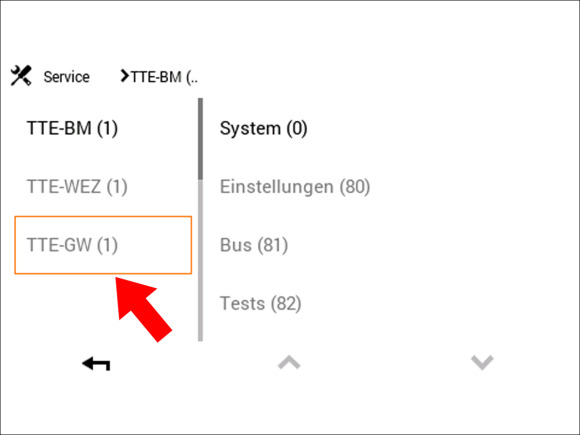
Step 4:
Click on “TTE-GW” in the column on the left.
Note: If the “TTE-GW” option is not immediately visible, click on the arrow button at the bottom right to scroll down until the “TTE-GW” menu item appears.
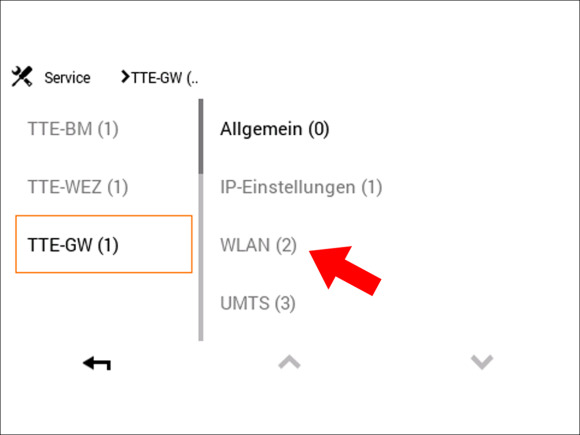
Step 5:
Now click on “WLAN” in the column on the right.
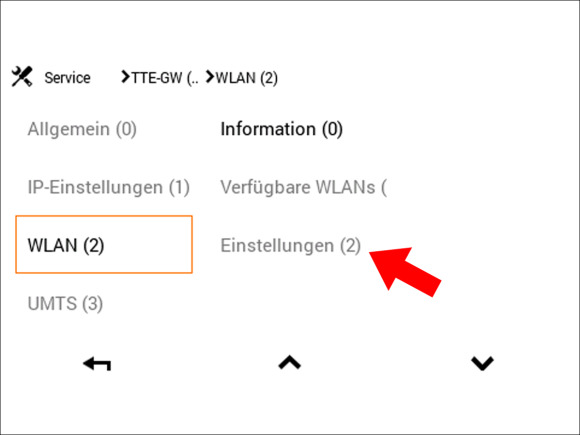
Step 6:
Now click on “Settings” in the column on the right.
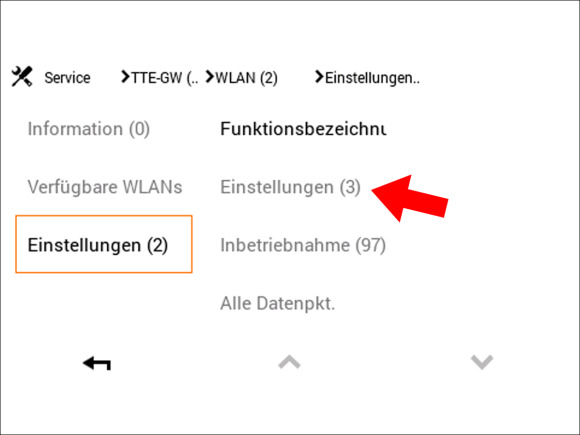
Step 7:
Click again on “Settings” in the column on the right.
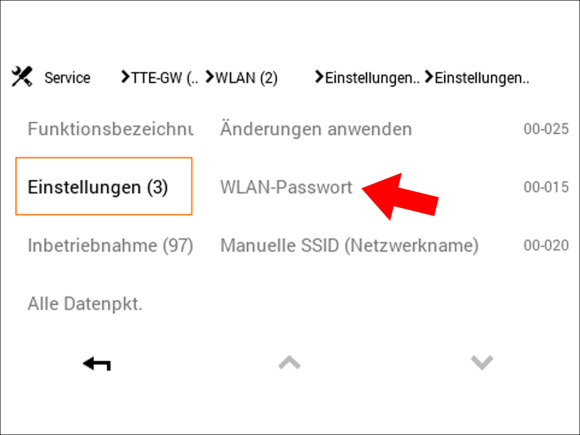
Step 8:
Now click on “WLAN password” in the column on the right.
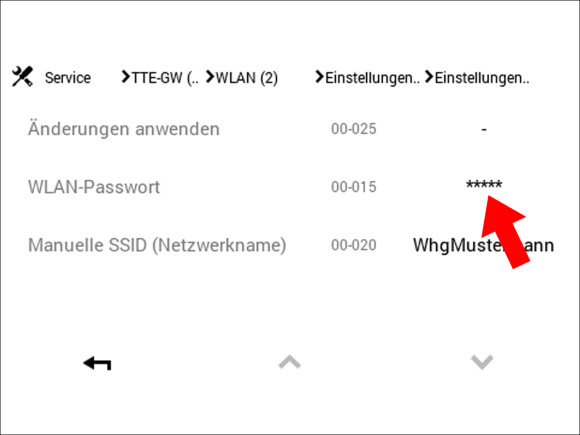
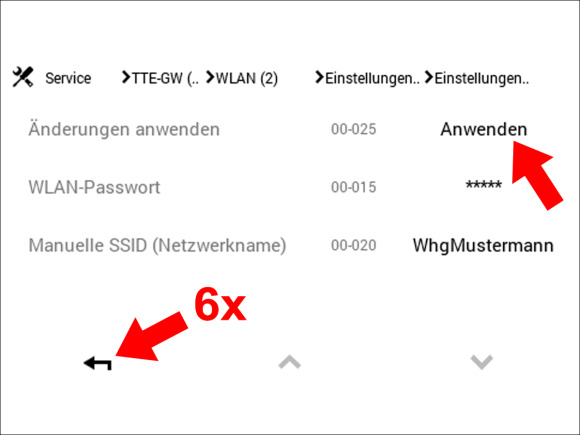
Step 9:
You should see this screen. Now click on the five asterisks “*****” on the right in the “WLAN password” row.
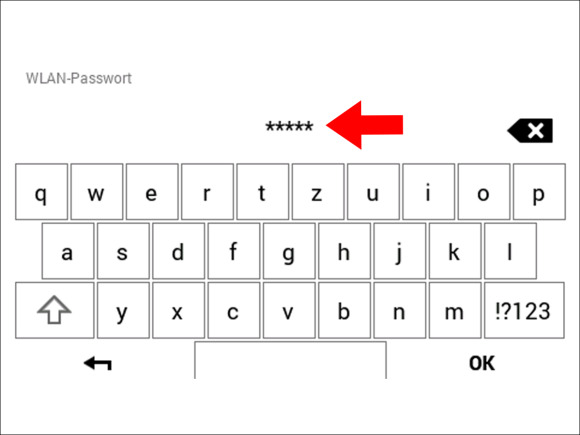
Step 10:
Enter the new WLAN password for your chosen WLAN here.
Note: Your Internet provider will give you this password. Then click on “OK” at the bottom right.
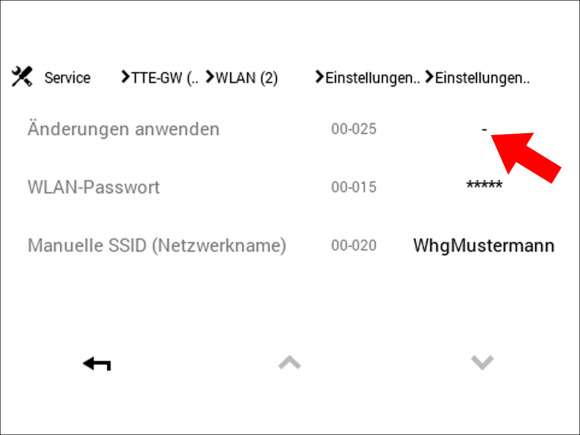
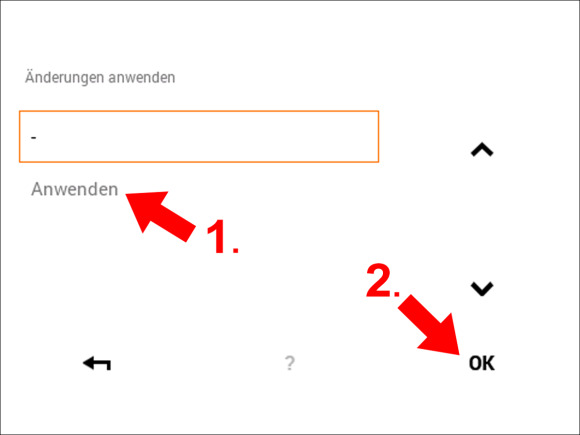
Step 11:
Click on the dash “-” on the right in the “Apply changes” row.